
Key Takeaways for Build-to-Print Programs
- Build-to-print manufacturing succeeds when the prototype-to-production transition runs with clear controls that prevent rework, vendor fragmentation and quality gaps.
- A fabrication-specific DFM review catches design issues early and prevents production delays, tooling changes and cost creep.
- Material and process decisions at design freeze, combined with first-article inspection and quality gates, create the documented baseline regulated industries require.
- Agile manufacturing cells and one-roof integration simplify supply chains, reduce handoffs and support scalable output without the rigidity of large contract manufacturers.
- Recognizing common scaling pitfalls early prevents costly corrections; partner with Fabcon to evaluate a build-to-print program and accelerate the transition from prototype to production.
Step 1: Conduct a Fabrication-Specific DFM Review
Most prototype-to-production failures start in the design, not on the factory floor. A fabrication-specific design-for-manufacturability review catches those failures before they become tooling changes or production delays.
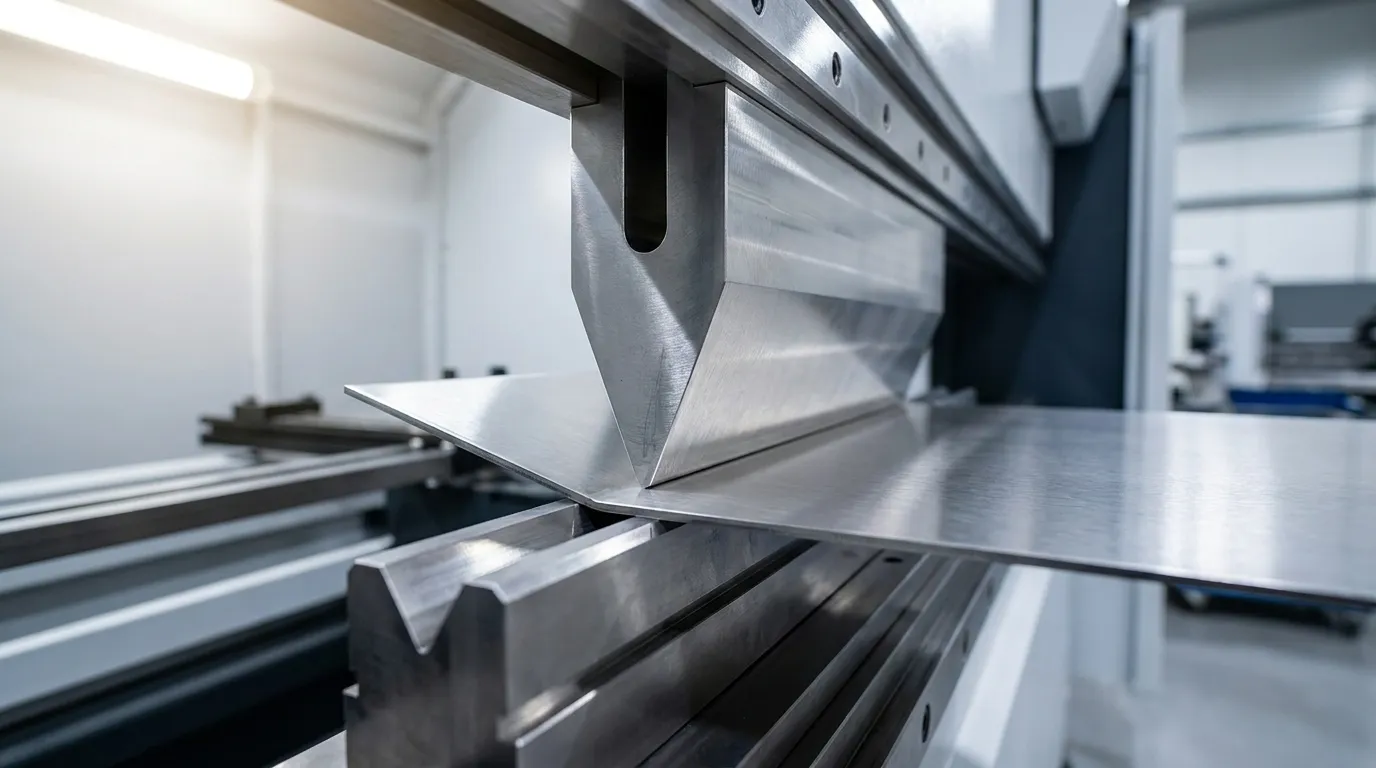
Sheet metal follows physical rules that additive or machined prototypes do not. Bend relief, minimum flange lengths, hole-to-bend distances and consistent bend radii all affect whether a part can be formed repeatably at volume. When designs ignore these constraints, the impact is measurable. Designs that fail multiple DFM checklist items average longer first-article delivery times and carry a cost premium compared to designs that pass review. This cost penalty is avoidable because DFM feedback before production often reduces fabrication cost without affecting function.
A DFM review for sheet metal and light assembly programs should examine:
- Bend radius relative to material grade and temper
- Tolerance stack across multi-bend assemblies
- Hole-to-bend and hole-to-edge clearances
- Hardware placement for press-in inserts and PEM fasteners
- Weld access clearances and distortion risk on thin stock
- Finish thickness impact on mating surfaces and hole fits
- Assembly integration points for electromechanical components
Prototypes built with additive processes introduce a specific risk. The geometry may be functionally valid but physically incompatible with sheet metal forming. Features that print without cost penalty, such as deep undercuts, nonstandard wall transitions and complex curves, often require redesign before a fabricator can hold tolerance at volume. Engaging a fabrication partner at the DFM stage, before geometry is frozen, is the most cost-effective intervention in the entire program lifecycle.
Start with a fabrication-specific DFM review from Fabcon for a build-to-print program.
Step 2: Make Material and Process Transition Decisions
Material selection in build-to-print manufacturing must support both function and forming at the intended volume. The transition from prototype to production confirms that the chosen material grade, gauge and finish align with those goals.
For forming operations, 5052 aluminum often outperforms 6061-T6 because 6061-T6 lacks ductility and tends to crack under bend forces. Specifying nonstandard sheet thicknesses increases material cost because suppliers must custom order or machine down from thicker stock. For environments with chlorides or aggressive cleaners, 316L stainless should replace 304 to improve corrosion resistance.
Build-to-print differs from build-to-spec in a critical way. In build-to-print, the OEM owns form, fit and function while the fabricator owns conformance. In build-to-spec, the fabricator owns more of the engineering, with shared design ownership defined in the contract. Most programs start closer to build-to-spec during early development. They then freeze the design and transition to build-to-print for the production life. Material and process decisions made at that freeze point carry through the entire production run.
Once materials and processes are locked, the next decision focuses on whether to invest in hard tooling or continue with bridge production methods.
Tooling Versus Bridge-Production Choices
At lower annual volumes, laser cutting and brake forming often provide the most economical production method, with no hard tooling investment required. The volume threshold where progressive dies and automated bending cells begin to replace manual laser-cut and brake-formed parts sits higher. Below that threshold, bridge production, which runs the same prototype process at higher quantities, preserves design flexibility and avoids tooling commitment on a design that may still evolve.
The decision criteria stay straightforward. If annual volume is below the tooling threshold and the design is still maturing, bridge production is the correct choice. If volume is confirmed and the design is frozen, tooling investment amortizes across the run and reduces per-unit cost. A vertically integrated partner can model both scenarios and recommend the transition point based on actual program data.
Step 3: Establish First-Article Inspection and Quality Gates
First-article inspection provides formal, documented verification that the first production unit conforms to all engineering drawings and specifications before full-volume release. FAI validates that production processes can consistently produce conforming products and includes dimensional verification, material certification review, functional testing and traceability documentation.
Under AS9102C, a full FAI is required for new part numbers, design changes affecting fit, form, function, safety or performance, production lapses of 24 months or longer, new production sites and material or special process changes. For ISO 9001:2015 programs without AS9100D requirements, FAI serves as best practice rather than a mandatory standard. The discipline it imposes through documented dimensional results, material certs and traceability records applies to any mid-volume precision program.
Quality gates for a build-to-print prototype-to-production transition should include:
- DFM review signoff with documented disposition of all flagged items
- First-article inspection report with measured values against every drawing characteristic
- Material certifications and traceability records tied to the production lot
- Process capability data on critical dimensions before volume release
- Finish and assembly inspection against acceptance criteria
Build-to-print manufacturers must document events that could affect product integrity and communicate them to the customer even when parts meet specification, as product safety requirements apply throughout the supply chain. Traceability functions as a control mechanism that allows a program to respond to field issues, supplier changes or regulatory audits without production disruption.
Step 4: Scale Production with Agile Manufacturing Cells
Production scaling works best when capacity grows without locking into rigid structures. Large contract manufacturers offer scale but impose rigidity. High minimum order quantities, long onboarding timelines and fixed production lines often conflict with the high-mix, evolving-BOM programs common in infrastructure and technology sectors. Small job shops offer responsiveness but lack the infrastructure to sustain mid-volume output with consistent quality.
Flexible manufacturing cells provide a middle path. Instead of dedicating a fixed line to a single product, agile cells reconfigure around the program. They accommodate volume changes, SKU additions and BOM revisions without the overhead of a large contract manufacturer. Production ramp-up milestone gates require data-driven evidence with checklists, owners and signed acceptance rather than opinions, and agile cells generate that evidence at each gate without disrupting output.
NPI program leads managing compressed launch timelines gain a practical advantage. A flexible cell can run pilot builds, incorporate engineering changes and transition to production-rate output within the same facility. This approach avoids requalifying a new supplier or re-establishing a quality baseline.
Step 5: Simplify the Supply Chain Through One-Roof Integration
Supply chains scale more smoothly when vendor counts stay low. Fragmented vendor bases are a common source of scaling friction in build-to-print programs. When fabrication, finishing and assembly are split across multiple suppliers, every handoff introduces a coordination point where quality issues, schedule delays and accountability gaps can emerge. Electromechanical assembly and box-build work is growing at a strong rate in North America, driven by defense primes and medical-device OEMs outsourcing final integration. Programs that win on schedule often rely on fewer vendor handoffs, not more.
One-roof integration places fabrication, CNC machining, finishing, including powder coat, wet paint and mil-spec coatings, and light electromechanical assembly under a single purchase order with a single accountable partner. The benefits are direct. Lead times shorten because parts do not ship between vendors. Quality traceability improves because the entire build history lives in one quality system. Program management simplifies because there is one point of contact for engineering questions, schedule updates and corrective actions.
NTMA survey data shows that nearly 25% of precision manufacturers reported increased reshoring activity over the past six months, with 26% expecting further growth ahead. That trend increases demand for domestic partners capable of handling complete programs, not just individual fabrication steps.
Common Scaling Pitfalls and How to Avoid Them
Several failure modes appear consistently in build-to-print prototype-to-production transitions. Recognizing them early prevents costly corrections at volume and supports smoother launches.
Additive prototype translation risk. Geometry designed for 3D printing often carries features incompatible with sheet metal forming. Walls, radii and transitions that are cost-free in additive manufacturing may require redesign or secondary operations in fabrication. A DFM review at the transition point, before tooling, provides the correct intervention.
Over-tolerancing noncritical features. Rationalizing tolerances by tightening only functionally critical dimensions can reduce fabrication cost on tolerance-dense designs. Blanket title-block tolerances that apply tight specifications to every feature increase cost and rejection rates without improving function.
Configuration drift during NPI. Unrecorded verbal changes, alternate components or test workarounds during NPI can cause the volume build to diverge from the qualified design. That drift leads to rework, inspection delays or requalification in regulated markets. Every change must be documented and dispositioned against the released drawing package before volume authorization.
Vendor handoff delays. Splitting fabrication, finishing and assembly across multiple suppliers creates schedule dependencies that compound. A single supplier change or quality hold at one vendor can delay the entire program. Consolidating under one partner removes those dependencies and stabilizes schedules.
Industry-Specific Uses for Build-to-Print Production
The build-to-print prototype-to-production framework applies across infrastructure and technology sectors where precision, traceability and scalability remain nonnegotiable.
Data center infrastructure programs require modular, rack-mounted enclosures and structural systems with consistent dimensional accuracy across production runs. Any variation in fit affects cooling performance and cable management in hyperscale and edge deployments.
Traffic safety and transportation programs depend on fabricated components engineered for compliance and field durability. Consistency across production lots functions as a safety requirement, not a preference.
Energy storage and power distribution programs rely on weatherproof enclosures with integrated electromechanical assembly for commercial and public deployments. The combination of precision fabrication and wiring integration under one roof removes a common source of field failures in this segment.
Medical device programs require fabricated assemblies, including carts, lab equipment and medical furniture, with full traceability and precision assembly. ISO 9001:2015 certification and documented quality records serve as auditable requirements, not optional additions.
Aerospace and defense programs operate under AS9100D and ITAR requirements, with zero tolerance for configuration errors. A&D customers require complete records including first-article inspection, material certs and full traceability to clear their own acceptance process, with documentation treated as an integral part of the deliverable.
Connect with Fabcon’s team to evaluate build-to-print program requirements and fit.
Frequently Asked Questions
What is the difference between build-to-print and build-to-spec manufacturing?
Build-to-print means the customer supplies a complete drawing package, including 2D drawings, 3D models, tolerances, materials and finish requirements, and the manufacturer produces exactly to those specifications without altering the design. The customer retains full design authority and intellectual property. Build-to-spec means the customer provides functional requirements, such as load, fit, environment and target cost, and the manufacturer proposes the design, process and material approach. Build-to-spec allows more manufacturing-driven refinement but transfers some design responsibility to the supplier. Most programs begin closer to build-to-spec during development, then freeze the design and transition to build-to-print for the production life of the part.
When is first-article inspection required in a build-to-print program?
First-article inspection is required before volume production release on any new part number, after design changes affecting fit, form, function, safety or performance, after production lapses of 24 months or longer, when moving to a new production site and after material or special process changes. For AS9100D programs, FAI follows the AS9102 standard and uses three formal documentation forms covering part number accountability, product accountability and characteristic accountability with measured values. For ISO 9001:2015 programs without AS9100D requirements, FAI remains best practice and the documentation discipline it imposes, including dimensional results, material certs and traceability records, supports any mid-volume precision program.
How does a vertically integrated manufacturer reduce supply chain risk in prototype-to-production transitions?
Vertical integration removes the vendor handoffs that create common sources of schedule delay, quality disputes and accountability gaps in build-to-print programs. When fabrication, finishing and light electromechanical assembly are managed under one roof with a single quality system, traceability stays continuous from raw material through final assembly. Engineering changes are implemented once, not coordinated across multiple suppliers. Schedule dependencies shrink because parts do not ship between vendors. The result is shorter lead times, cleaner quality records and a single point of accountability for the entire program.
What DFM issues most commonly delay the prototype-to-production transition for sheet metal parts?
The most common DFM issues that delay production transitions include tolerance stack across multi-bend assemblies, bend radii specified tighter than the material and process can hold, hole-to-bend distances that cause distortion during forming, hardware placement that conflicts with forming operations and finish thickness that affects mating surfaces and hole fits. Beyond these standard issues, parts prototyped additively often carry the geometric incompatibilities discussed earlier in the DFM review section. Engaging a fabrication partner for DFM review before geometry is frozen prevents these issues at the point where changes cost the least.
Conclusion and Next Steps
The build-to-print prototype-to-production transition succeeds when engineering discipline, quality traceability and supply chain accountability operate as a single integrated system, not separate workstreams managed across fragmented vendors.
The five steps in this guide provide the framework. A fabrication-specific DFM review catches design issues before they become production costs. Material and process transition decisions made at design freeze carry through the entire production run. First-article inspection and quality gates establish the documented baseline that regulated industries require. Agile manufacturing cells scale output without the rigidity of large contract manufacturers. One-roof integration removes the handoffs that create schedule and quality risk. Recognizing common pitfalls, including additive translation risk, over-tolerancing and configuration drift, prevents the rework cycles that compress margins and delay launches.
The recommended next step is an internal needs assessment. Teams can identify the current vendor count for fabrication, finishing and assembly, document the quality certifications required for the program and define the volume range and timeline for the production transition. That assessment then supports a productive discussion with a manufacturing partner capable of evaluating the program end to end.
Fabcon has supported precision sheet metal and light electromechanical assembly programs from prototype through production since 1977, operating across 220,000 square feet of vertically integrated manufacturing space with ISO 9001:2015, AS9100D and ITAR credentials.